


assalamualaikum wbt
PHP : Admin
page ; view user, delete user and update user
PHP : Check
name username behaviour
#
Open dreamweaver
#
Open register.php page
#
Go to panel server behaviour, click on plus ( +
) sign button and go to user authentication and choose check new username
#
Pop up check new username > Username field :
username and direct page if username already exist (example ; page go to
readyuser.php
# Then click ok and save your file
#
Then open new file, create readyuser.php file.
#
In readyuser.php page, type whatever you want to
display when new user key in the right username
Admin databased
_______________________________________________
Admin1 login
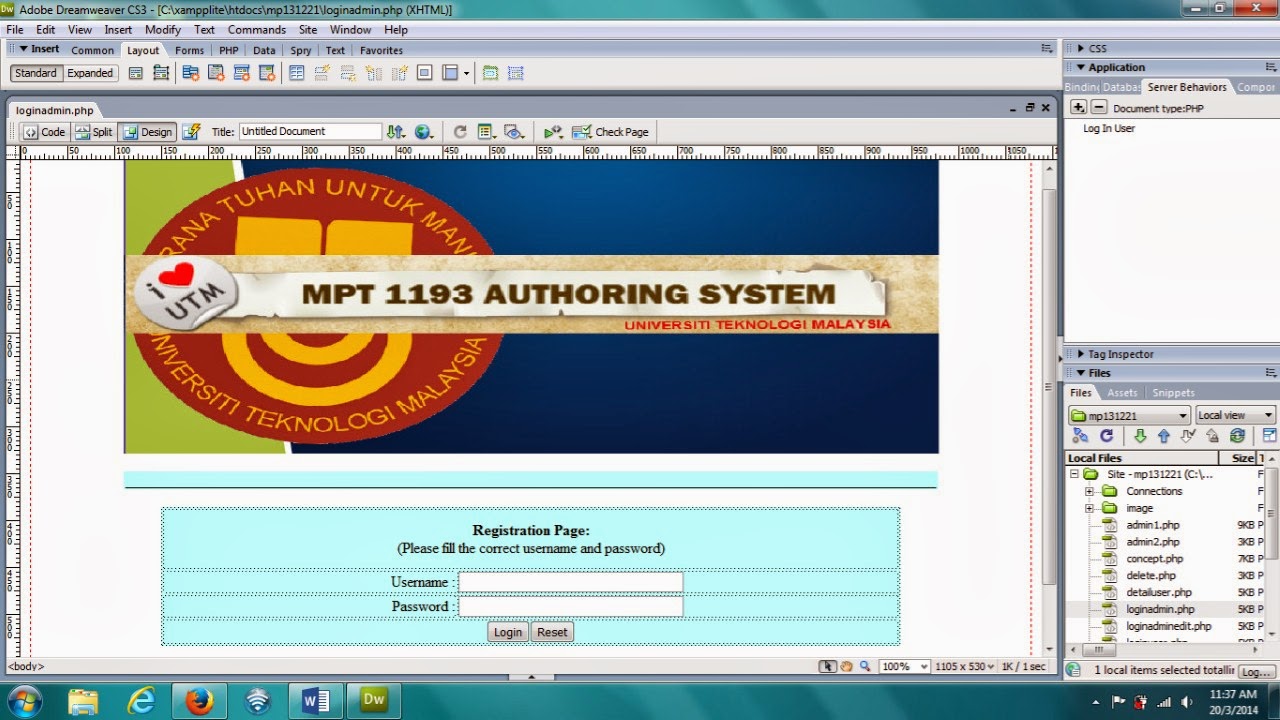
#
Open Dreamweaver > go to file > click new
> click blank page > click PHP > click create
#
Create login page for admin (loginadmin.php)
#
Go to panel server
behaviour > click plus button (
+ )
#
Go to user
authentication > choose login
user
#
Pop up login user > validate using connection (choose your connection) > choose table (admin table) #
username column is username > password column is password
#
If login
succeeds, go to : admin1.php
#
if login fail, go to : loginadmin.php
#
Restrict
access based on > choose
username, password and access level
#
And get
level from > level
#
Click OK
#
Click file and save
_______________________________
_______________________________
Admin view (admin 1)

#
Open Dreamweaver > go to file > click new
> click blank page > click PHP > click create
#
Create admin1 page for admin 1 view : (admin1.php)
For
view user

#
Open fail admin1.php
#
Go to panel server behaviour > click
recordset > fill form recordset
#
Go to panel binding > drag item “name” in the
table column view user (second row)
#
Highlight wording “{Recordset1.name}”
#
Go to panel server behaviour > click to
detail page.

#
Pop up detail page: detail page = detailuser.php
(create new fail for detailuser.php)
#
Pass url parameters : id
#
Pass existing parameters : tick at url
parameters
#
Then click OK.
#
Open new fail (blank page)
#
Create new fail for detailuser.php (in the
below)

#
Go to panel server behaviour > click
recordset (if already have, click cancel) > fill in the form > click ok.
#
Click panel binding > drag item beside the
item in the table. (name, username, password, age, email, phone, address and
remarks).
#
In the bottom of your table, please write
wording “back”
#
Wording “back” is function to go back to
admin1.php when user click it.
#
Save your fail as detailuser.php
#
Settle.
______________________________
For delete user
#
Go to column delete user > second row
please write word "delete".
#
Highlight wording “delete” and go to panel
server behaviour and click “go to detail page”
#
Pop up go to detail page: detail page >
write ; delete.php (you can create later, look below)
#
Pass url parameters : id
#
Pass existing parameters : tick at url
parameters
#
Then click OK
#
Create new file (blank page)
#
click panel server behaviour > click
recordset > fill in the item > click ok.
#
Then, click panel server behaviour again >
click delete record
#
Pop up delete record ; primary key column =
id
#
Primary key value = url parameters : id
#
After deleting go to : admin1.php (page
admin1 view)
#
Then click ok
#
Save your fail as delete.php
#
Settle.
_____________________________________
How
to update user
#
Open fail admin1.php
#
Highlight wording “update”.
#
Go to panel server behaviour > click to
detail page.
#
Pop up detail page: detail page = updateuser.php
(create new fail for updateuser.php)
#
Pass url parameters : id
#
Pass existing parameters : tick at url
parameters
#
Then click OK.
#
Open new fail (blank page)
#
Create new fail for updateuser.php (in the
below)

#
Go to panel server behaviour > click
recordset > fill in the form > click ok.
#
Click panel binding > drag item in form text
field in the table. (id, username, password, age and etc)
#
In the bottom of your table, insert button

#
Put your cursor beside update button, click
insert > form > hidden field
#
Fill in the properties of hidden field

#
Click the flash symbol and you can see the pop
up like below

#
Pop up dynamic data > select id > click ok
#
Save your fail as updateuser.php
#
Settle.
____________________________________
YouTube video from Vicky
Admin databased
Admin1 login
Admin view (admin 1)
Admin view (admin 2)
Restrict
: PHP restrict access to page
PHP : Go to detail page
PHP: Create detailpage.php
https://www.youtube.com/watch?v=BQj32f5hays
https://www.youtube.com/watch?v=BQj32f5hays
PHP: update behaviour
PHP : Delete behaviour
TamaT
SELAMAT BERAMAL
SELAMAT BERAMAL


